Friday, April 29, 2011

Mad for compost, and planting tomatoes

Illijana has proven so adept at getting green matter for us to make compost out of that I went out today (to Costco) and purchased another compost tumbler.  This is a different tumbler than the previous one, is smaller, constructed of recycled plastic, and is a great buy at the in store price of $99.  It holds 80 gallons (10.72 cubic feet) of compost.  I'll be putting it together tomorrow and then taking it for a test run.
I also stopped at Thomas Home Center in McKinleyville today.  They have a bin which holds their discarded sawdust which they give away.  I loaded up on sawdust as the carbon source for the compost.  Theoretically compost should be 3 parts nitrogenous material (like grass from lawnmowing) to 1 part carbon material (like sawdust or coffee grounds).

I also wanted to recommend a good video about tomato planting from the folks at Peaceful Valley Farm Supply.  Check out the link for a 4 minute seminar on planting.  Planting tomatoes video

Wednesday, April 27, 2011

Grand plans and slug patrols

Some days in the garden have grand plans that I set out to accomplish.  Other days I  go out and let the garden speak to me and just do what needs to be done.  Today was one of the do what needs doing days.  I weeded the plantings of peas with my fingers and the areas around them with a hand hoe.  I put stakes in the ground to hold up the growing peas.  I fertilized previous plantings with Maxsea, the seaweed based fertilizer I use.  I cut some asparagus and picked some Imperator carrots which overwintered in the garden and had them for dinner (whole wheat spaghetti and thin carrot slices cooked together, with a tomato sauce including sauteed garlic and asparagus).
Finally tonight, I caught Illijana in the act of slug patrol.  Note the flashlight and the bent posture which are classic slug patrol requirements.

Tuesday, April 26, 2011

Planting those tomatoes

     I planted the rest of the tomatoes we have room for today.  There are now 6 in total in the hydroponic setup in the greenhouse, and 10 in the hothouse.  The hydro tomatoes are the varieties Legend, Cristal, Sweetie, (2) Nova, and Glacier.  We have those and Stupice (pronounced Stew peach ka), sweet million, and red jelly bean planted in the hothouse in the ground.  We have 66 extra tomato plants to give away.  Anyone want one or two (dozen)?  Here are the plants in the hydroponic tray in the greenhouse.

I'll post pictures in a few months to show the tomatoes growing into a jungle, getting 4 to 6 feet tall.  It is impressive.  Here is a picture of one of the garden beds planted last week.  The plants are really growing, surrounded by Illijana's grass mulch.  (Click to enlarge)

Monday, April 25, 2011

Hydro and 'maters

     It is quite difficult to grow tomatoes outdoors where I live.  We are about 400 feet from the Pacific Ocean in far northern California, and it really doesn't get hot enough to ripen most tomatoes outdoors before they succumb to fungal diseases (due to humidity and coolness).
     Enter the greenhouse and hothouse.  We call our greenhouse the structure in which we grow plants in pots and hydroponically.  We call the hothouse the place we grow plants in the ground.  Today was the day that I prepared this years hydroponic setup and planted the first two tomatoes.
physan scrub
     To prepare the setup, I first wash the containers and pump in Physan 20 (a hospital and greenhouse anti-fungal and anti-bacterial soap), put the whole thing together which means installing the pump, programming the timer, filling the pots with pellets, and filling the lower container with water and fertilizer.  I then take a tomato plant in a pot, wash out the roots in running water, and put the plant in one of the pots with the pellets.  We usually plant six tomatoes in the pots. (You can enlarge pictures by clicking on them).
timer
Pellets and pump running
two containers

     I did plant two tomato plants in the hydroponic setup this evening, but we will have to wait until tomorrow for pictures.


     Another part of today's garden adventure was re-potting plants grown in six packs into larger containers.  I did this with cauliflower, lettuces, broccoli, pac choi, and basil.  I do have an excess of tomatoes to plant.  We will be giving away quite a few plants after I plant tomorrow.

Tomatoes ready to plant

Wednesday, April 20, 2011

Planted full, slug patrol, and blooms

I spent an intensive two days planting out starts into our garden beds recently.  Two of the three main veggie garden beds are full!  I am trying to leave space for beans which get planted later, but we now don't have much room for winter squash.  I'll have to figure out where to put them soon. Here are two of the planted out beds.
A new crop of shelling peas is up, and the Queen Cox apple tree is blooming.


The rhododendrons are beginning to bloom.  I love their beautiful flowers.  Most are from Singing Trees rhody farm in McKinleyville.

A final note:  the most effective slug and snail preventer in our repertoire is  "slug patrol" which occurs in the late evening, flashlight in hand, picking slugs and snails off the baby plants and squishing them underfoot (or drowning them).  It is the only kind of soldiering that appeals to me.  We use Sluggo (iron phosphate) as snail bait, but it is not totally effective against small slugs, so we do the nightime picking off the plant routine to keep the plants alive and growing.  They love the bok choi even more than I do.

Sunday, April 17, 2011

Planting a rhody

     Illijana and I went garden shopping today and came home with three half-price plants (an orange geum, and two chrysanthemums) from Miller Farms nursery, and from the Singing Trees Nursery a large rhododendron named Karen Triplett, and a large flowering bush called barberry darwinii.  When we got home I put the rhody in the ground.
     I first looked up planting directions for rhodies from the American Rhododendron Society at http://www.rhododendron.org/planting.htm.  Since we have very sandy soil here I followed their directions for sandy soil planting.
     After wheeling the plant up to the chosen planting site, I skimmed off the grass and created a circular hole in which to dig.  After measuring the plant in the hole to be sure the hole was the proper size I dug the hole with a shovel, then took a pitchfork and loosened the soil below.  I spread some fertilizer in the hole (blood meal, bone meal, greensand, alfalfa meal, and chicken manure pellets), put the plant in the hole and filled the hole in with the previously dug soil.  Finally I spread a small amount of acid loving plant fertilizer on top.  The final step to be taken tomorrow is to mulch it with pine needle duff.  Voila, a planted rhody!


Saturday, April 16, 2011

Harmless madness

     I found myself thinking about the concept of harmless madness today as I planted out seedling starts in the pouring rain.  It seemed like an apt description of what I was doing.
     The day started with a check on the new compostumbler.  When I rotated it I noticed steam coming out of the vents, and when I checked the temperature, sure enough, it was 142 F.  That is quite good.  
     Later I took a tray of 6 packs and 3 summer squash plants up to the "bio-dynamic bed", the one raised bed we don't rototill at all, but use a big U-bar to loosen the soil once a year.  My planting technique is to mix some fertilizer into a hole I prepare for each plant, pour a solution of Maxsea (a seaweed based fertilizer-but not completely organic) into the hole, push the plant out of the six pack, untangle the roots, and plant into the hole.  The fertilizer mix is one part alfalfa seed meal, one part greensand, one part blood meal, and two parts bonemeal.
     I try to plant intensively, that is closely.  All this was being done for a few hours in the rain, hence the idea of harmless madness.  Here is today's pic which you can click to enlarge:

Friday, April 15, 2011

Singin' and transplantin' in the rain

(In commemoration of Gene Kelly, Donald O'Connor, Debbie Reynolds, and my favorite film)...
Compostumbler


Our compost tumbler arrived a couple of days ago.  I spent maybe 4 or 5 hours assembling it.  We did a bit extra in the assembly based on our experience of having a tumbler for over 10 years.  Its only problem was rust, so this time I spray painted the metal parts with rust inhibiting paint, and will do touch up if any rust shows up.
We loaded the tumbler with grass clippings and pine needle duff.  Theoretically one should have 4 parts green or nitrogenous matter for each part of brown or carbon matter.  Even though the grass clippings had been composting on their own and were steaming for three days in a pile (where the tarp is in the picture), this morning I took the temperature of the mass in the tumbler and it was up at 140 degrees F.  Yay!
The tumbler is easy to turn, and does produce excellent compost in 2 to 3 weeks in spring, summer, and into fall.  I love having compost to use as mulch.

Since it is raining today, I found myself singing the title track to that wonderful movie, Singin' in the Rain, as I mixed potting soil and fertilizer and began the process of transplanting tomato plant baby plants into larger pots.


First I used our outdoor potting bench, mixed potting soil (Foxfarm Happy Frog) with a small amount of Gardner and Bloom organic fertilizer, cleaned a number of small pots, packed them with mix, brought them into the greenhouse, and transplanted the young tomato plants which were planted March 9th into the larger pots.
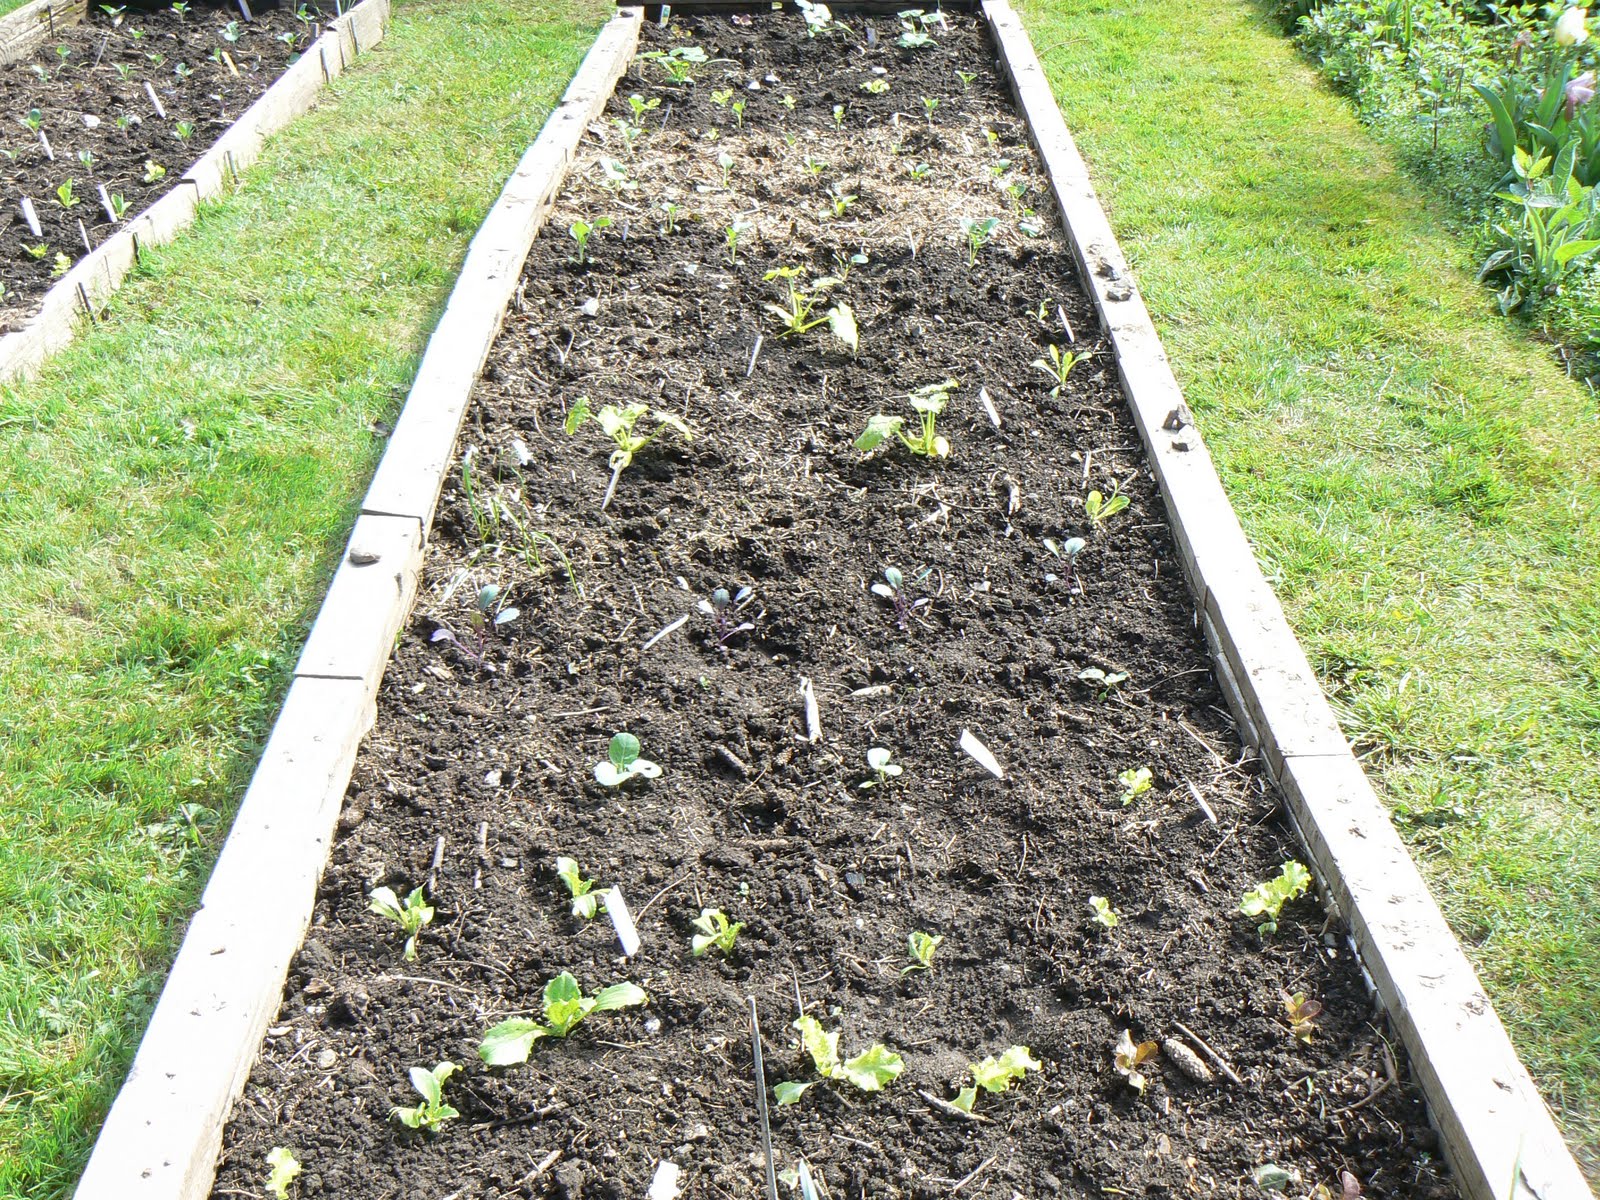
I tried to be careful when disentangling the root systems.  I normally plant two seeds per six pack cell and separate the root systems when transplanting.  Finally I watered the plants and set them on the lower heat mat which keeps them at about 67 degrees.  The final picture shows some transplants from a few weeks ago.  Tomatoes are coming! (despite the endless rain)

Friday, April 8, 2011

Potting soil, rustic monuments, and the moors of Scotland

I noticed today that our garden and yard is looking much better this year than in the past at this time of year. Our daily garden work is paying off! We were asked recently if we would be the main tour garden for a local garden tour in May, but we begged off until next year. Hopefully we will be caught up with our garden projects by then.
Today, Illijana erected concrete block sentinels by our western gate. They look like primitive guardians. We decided to plant something that would drape over them and that would look good with the rose covering the archway. I picked out two heathers today at Miller Farms Nursery. We have 4 or 5 heathers in our back yard and they do well there. The spot by the sentinels is a tougher growing spot, windier, and with less direct sun. I hope they make it there. We are hoping that plants that exist on Scottish moors can survive the wind and salty sea air.
Heathers in the backyard


I also purchased more potting soil today. We used to use PowerFlower from McClellan Mountain Ranch, a Humboldt county manufacturer, but it seems that they are no longer in business. So after trying a number of different types of potting soil I've settled on Happy Frog from FoxFarm. I've taken to adding a touch of Gardner and Bloom organic fertilizer to the mix and using it for starts.
I planted four tomato plants today in our hothouse in the ground (thanks to David for the donation of the plants). I planted them a bit close together and think it will lead to jungle gardening, but we have quite a few more to plant in the next month.
Another little project today was covering the recently planted peas with woven fiber to keep the birds from eating the seeds and young plants.
More Moss terrace concrete block work tomorrow.

Thursday, April 7, 2011

Clip, clip

Illijana did one of those jobs today that only gets done once a year (twice a year if we are good about it). We have a black stemmed pittosporum hedge on the western boundary of our property by the road. It needs taming each year, and she clipped it yesterday and today. Here is the final result... (click pictures to expand them)

I sprayed the apple and pear trees today with micropulverized sulfur mixed with water. I had noticed some mold type spores on leaves yesterday, and since today was clear enough to spray, I did so. I've been trying to stay on a two week spray cycle. I'm determined to stop the scab and other diseases this year. Hope it works.


The greenhouse is getting full. There are lots of transplants happening (to larger pots), and new seed plantings. Today I transplanted zucchinis to larger pots, tomatoes to larger pots, and planted three kinds of broccoli, three kinds of lettuce, pac choi, cauliflower, cabbage, and three kinds of basil, all into 6 packs. I love the greenhouse.

Wednesday, April 6, 2011

Luxury Bee Condos

We have been trying to figure out pollinators. We can't have European honeybee colonies here because of the local bear population, so we have been exploring the Orchard Mason Bee (Osmia lignaria). Yesterday, we constructed some luxury bee condos. These are the Ray Wolfe models of bee housing (he is a guy who's houses sell at a premium because of quality construction). Here are pics. We placed the condo on an old worm bin we had which cannot be used anymore due to bear predation. Nice base for the bee condo though.


Monday, April 4, 2011

I planted four varieties of peas today, two of which were shell peas (Knight and Maestro), one sugar snap (Cascadia), and one snow pea (Oregon Sugar Pod). My wife accused me of practicing "boutique gardening" because of the time and attention I take in planting each pea. There is something to this, as I know I'd never make the speed necessary to be a farmer. I do take lots of time with preparation and planting. In fact, I awoke about 3:30 am this morning with the realization that I had not soaked the peas I was going to plant today. So I dutifully got up, soaked each variety, and eventually went back to bed.
The first thing I did this morning was to weed the garlic patch. I love doing that because the aroma of garlic is released and it smells wonderful as I weed.

Next up was weeding a patch of ground to plant the peas, and then planting the different varieties.


In the meanwhile Illijana was weeding after doing a major round of lawnmowing. We are really trying to get grass clippings in the mix as organic matter for our garden beds, and to that end I searched around town for the original Compostumbler, a very large composter which turns. We had one for many years and loved it, but it eventually rusted out. I could not find one locally, so I ordered it online today. It should be here within two weeks. It will make us focus on compost and mulch for garden bed improvement.

Here is a link to info about the Compostumbler from the place I bought it... (since I haven't mastered the art of embedding links you may have to cut and paste this to your browser window: http://www.woodlanddirect.com/Outdoor/Compost-Tumblers/Original-ComposTumbler

A special thanks to neighbor Larry today for bringing over two bags of lawn and garden clippings!

Sunday, April 3, 2011

Phew! That was alot of work.

It was a beautiful day in Trinidad today, warmish for the time of year, and very sunny.  The wind had abated since yesterday, so it was a great day to garden, and that is what we did.  Illijana mowed the entire lawn and the neighbor's property across the street after I had weed whacked the edges.  "Weed whack" means to use a gasoline powered string trimmer to cut down the weeds and grass along the edges of our garden beds.
We used the green grass clippings mixed with limestone, greensand, bone meal, and pelleted chicken manure to complete the mulch job started yesterday.  I also planted 100 dutch iris bulbs that should have been planted months ago.  They were intensively sprouting, and I hope they make it.  I also planted a malva plant which was languishing in a pot for months.
Better late than never bulbs

Later, I added pea supports for the bush peas.  It helps keep the pods up off the ground thus decreasing loss from rot.  We use the winter prunings from the fruit trees for these supports.
I also finished covering the bed I've been working on with mulch.  We have been considering the purchase of a big garden compost tumbler.  We had one for a whole lotta years (and still use pieces of it as the base of a bird feeder) and we like the way it turns out compost which can be used as mulch, but spending $400 on one is a stretch at the moment.
Pea supports (click to enlarge)

Malva and mulch


We have also started talking about attracting orchard mason bees to our yard.  These are solitary bees (not hive types) that like particular kinds of holes for their habitat.  They are very good pollinators.  We worked with them several years ago, but are about to get more serious about it after seeing some native bees in the area.  This involves drilling holes in wood blocks and setting up a conducive place for them to live.

Finally here are a couple of flower pictures (a luminous tulip and a Leontine Gervais rose blooming on the dog run today).


Saturday, April 2, 2011

Making that mulch

I spent some time today digging out pine needle duff in the forest behind our house, making up a blend of dolomite limestone, pelleted chicken manure, and greensand (for potassium), mixing it together, and spreading it on the bed which I had weeded a few days ago.  While I only got halfway today, I will try to finish tomorrow.  I did some ph testing again to see how the blend would work.  The duff today came in at ph 5.8 which is quite acid.  Soil in the section I was covering was ph 6.3, and after mixing the duff with the limestone mix, the mixture measured ph 6.5.
It was very windy today with a steady 20-25 mph wind with gusts to 35 mph.  I did feel quite nervous in the forest with the trees swaying intensely.  It is quite amazing how well they bend and move.
limestone mix


mulch mix