Sunday, July 10, 2011

Sauerkraut, Pesto

     As promised in my last blog entry, here is the description of today's activities of making sauerkraut from our red and green cabbages, and pesto from our greenhouse grown basil.
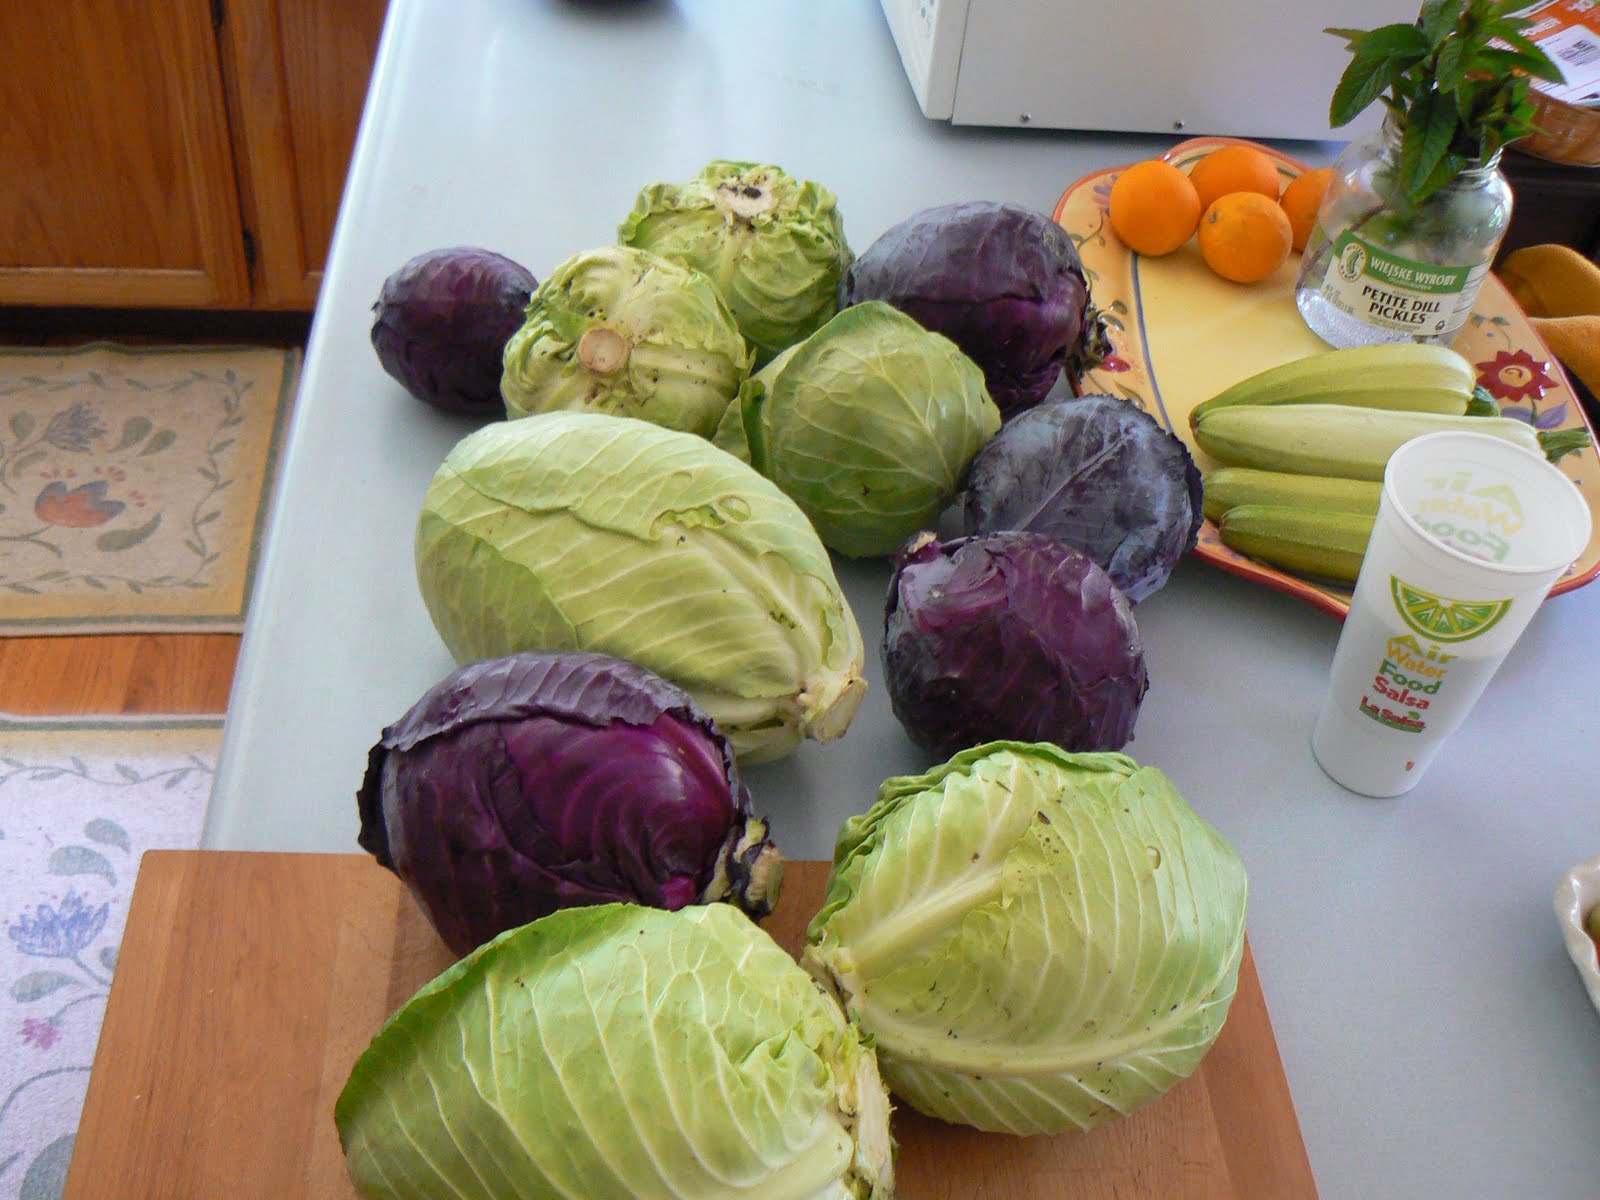
     I picked 11 cabbages this morning, 5 red and 6 green.  Red cabbages were the Primero variety from Territorial Seeds, and the green were both Derby Day and Blue Lagoon varieties.  Here they are in their natural habitat before picking.

I stripped off the outer leaves, killed all the slugs I found hiding in the leaves, and added the outer leaves to the compost pile.
Here are the 11 cabbages selected for the sauerkraut.
Next, we cut up the cabbages, washed them, cored them, and put them through the slicing attachment on our Oster kitchen center.


We added pickling salt to the packed down mixture which we pack into a food grade tub which has been scalded, and covered the coming sauerkraut with cheesecloth and a plate.  It then gets weighed down with a jug of water, and covered.  It begins to ferment, bubbles away, and in a few weeks we will have a lovely and yummy sauerkraut which we will water bath can and put away for winter.


That completed the process for the sauerkraut.  Next up was making Pesto.  We grow the basil for pesto in our greenhouse on heat mats since basil requires more heat than we have available out of doors.  This year I grew two types of basil, the large leaved Genovese, and the small leaved Spicy Globe basil.  Today was the second time I have picked this basil, and it grew amazingly well after I had cut it back the first time.  We will see if it grows back a third time.
     The process for pesto is interesting.  It can be done with a mortar and pestle (we have a pair made of marble), but today since I was doing a large quantity, I opted to use a food processing attachment to the kitchen center.  I decided to use the Alice Waters recipe for pesto from the Chez Panisse Pasta, Pizza & Calzone cookbook.  You basically blend a large quantity of basil with garlic, salt, peppercorns, olive oil, toasted pine nuts, and grated parmesan cheese.  This makes a paste which I freeze in an ice cube tray, and will later package using our vacuum sealing Foodsaver for the winter.  Here are some photos of the process.


This week I will be focusing on house maintenance, painting trim, restaining decks, and that kind of stuff.  I'll give you updates if it seems interesting.

Saturday, July 9, 2011

House at Pooh Corner

     It was one of those amazingly beautiful and busy days in the garden today.  It reminded me of the Loggins and Messina song "House at Pooh Corner".  "You'd be surprised there's so much to be done..."
(I'm listening to the song as I type).
     I started out with the standard duties of opening and watering the greenhouses, watering the new bed and its peas and beans, turning the Compostumbler.  My object was to get all the vegetable starts that were ready into the ground.  I got sidetracked right away by the weeds among the beans, so I spent some time freeing the bean bed from weeds.  I then weeded the new plantings of beets, and the carrots, and decided it was a good time to thin the beets and carrots.  It is a sad duty, but necessary for the eventual yield of the veggies.
     I then got out my trusty Mantis tiller, amended the soil in the areas I was going to plant, and tilled the soil in the two beds I was using.  We also have a no till bed that I planted in as well.  When transplanting I like to use Maxsea, a seaweed based fertilizer developed by an old acquaintance, John Dimmick from Piercy, CA (near Garberville in Southern Humboldt.)  When planting cole crops like pac choi, or broccoli I spread wood ashes around and on the transplant to try to stop the cabbage maggot (larvae of a fly).  You can see the transplants and the ashes in the pictures that follow (click to enlarge).  Unfortunately for me last night some marauding snails got to chow down on the pac choi and napa cabbage, but I did get to plant most of them.


The other main goal of the day was seeding the next round of lettuce, cauliflower, etc in containers in the greenhouse.  I had to wash and disinfect the trays and six packs before I got to do the planting.  Here is a picture of our outdoor sink, and then the filling of the containers with potting soil (Happy Frog).


Finally, I picked out the seeds and planted them with the aide of my dibble.  Here is the final result.
Tomorrow is making pesto and making sauerkraut day from the basil in the greenhouse, and the red and green cabbages in the garden.  I'll show those processes then.

Wednesday, July 6, 2011

Harvest, creating compost, planting beans, and a friend in the grass

There was a lot to do in the garden today.  I got out early and harvested peas, both Oregon Sugar Pod edible pod and Legacy shelling peas.  (Legacy is a sweet and extremely prolific pea.  I purchased my seed from Stokes Seeds.) Here is a photo of the harvest.
Edible pod and shelling peas

The next order of business was creating a full bin for the compostumbler- it takes 4 parts green materials (grass clippings in my case) to one part brown material (sawdust primarily).  I also use spent coffee grounds which I pick up at Starbucks when in McKinleyville.  I also add bone meal, blood meal, greensand, and alfalfa seed meal in small quantities to the mix.  This is what it looks like today.  In three weeks it will be quite different!


Another job that needed doing today was the final planting of bush beans.  I have a fairly short window of opportunity to plant beans here on the northcoast in order to get them ripe before the cool weather of fall makes them stop their growth process, so I planted the new garden bed described in the last blog post full with two types of bush beans (Blue Lake from current year's seed, and Jade from 2008 seed.  I planted the older seed very thickly because I wasn't sure of its vitality at this point.)
I usually lay out the seed in the bed, and individually press each seed into the soil.  I feel it gives each seed a little individual attention and encouragement.  I then label the planted area with the seed type and variety, the seed company and year of the seed, and the date planted.  Here are photos of the process.


Finally, when putting tools away, I noticed a small friend in the grass next to a garden bed-- a garter snake.  I enjoy having them around the area.
The proverbial snake in the grass (but I don't mind)

Sunday, July 3, 2011

Building a new garden bed and cold frame, with recycled concrete part 2

     We finished the first part of this project today.  Please read the part 1 previous blog for details.  Trying to get the bed "square" was a challenge but we did get close.  The next part of the plan is to place 4x4's at the corners of the bed, use recycled redwood bed boards to create a structure atop the concrete and eventually to build a cold frame cover out of fiberglass so that we can use the bed to grow winter veggies.  For now, we will be growing some bush peas, which I will plant tomorrow with the waxing moon.
My arms are tired from lifting, shoving, and moving the concrete!

Saturday, July 2, 2011

Building a new garden bed and cold frame, with recycled concrete part 1

     When doing construction in our garden, we like to use recycled materials to the greatest extent possible. We have 19 large (heavy!) concrete squares given to us by a neighbor.  We used others to create a retaining wall which was detailed in a previous blog post.  Today's work was the construction of a new garden bed/cold frame which we will use as a space to grow greens during the winter months after growing peas this summer.
     I first dug up the area we are using, added amendments, and tilled them in.  Today we laid out the bed, dug its edges, and began the process of setting its boundaries with the recycled concrete blocks.  We will be placing 4x4's at the corners, and redwood deck boards, also recycled, between the corners to construct a hinged cold frame with greenhouse fiberglass.  Each of the concrete blocks we are using weigh a ton (that is what it feels like) and we transported them to the site of their use on a hand truck.  Here are pictures of today's activity.  I will update this project on this blog until its completion.
The new bed
Setting the first blocks

front wall

What we completed today


We have had large numbers of hummingbirds around lately.  This evening this one stood still long enough for me to get a photo.  They are great fun to watch, and they are quite communicative with the local humans.
An entertaining Rufous (or perhaps Allen's) hummingbird


Friday, July 1, 2011

Planting beans, shelling peas, developing a new bed

     It was a lovely day on the north coast of California today, and I got to spend lots of time in the garden, but before I did, I spent about an hour shelling Legacy peas today.  Illijana then blanched them, and froze them, just as she did with the Cascadia sugar snap peas as well.
     I planted three varieties of bush beans today in the plot I had prepared yesterday.  Varieties were: Provider, an organic selection from The Cook's Garden purchased at Pierson's Garden Shop, Nash, a Territorial seed selection, and Roma II, a Romano bean also from Territorial.  I generally enjoy planting seeds in prepared beds.  Each seed gets placed where I want it, and gets individually pushed into the soil to the desired depth.  I end up feeling like each seed gets a little personal attention, and I like that.  I then label the patches of seeds, using recycled venetian blinds that have been cut up.  On each tag which I place at the corners of each patch to mark the planting area, I put the name of the seed variety, the date planted, and sometimes the seed company and year the seed was purchased.
     I covered some previously planted bean seed with Reemay today and noted that the bed had deer hoof prints in it.  Yuck.  We have been strategizing about stopping the deer from entering areas we don't want them to enter.  More on this topic in a later blog.
     I also fertilized and rototilled the bed from which I had removed the tree stump a few days ago (see the previous blog post 'Taking out a tree stump by hand.')  Fertilizer included chicken manure, wood ashes, alfalfa seed meal, greensand, blood meal, and bone meal.  I tilled the bed with my Mantis tiller, and then raked it smooth.  I will plant more peas there probably tomorrow.